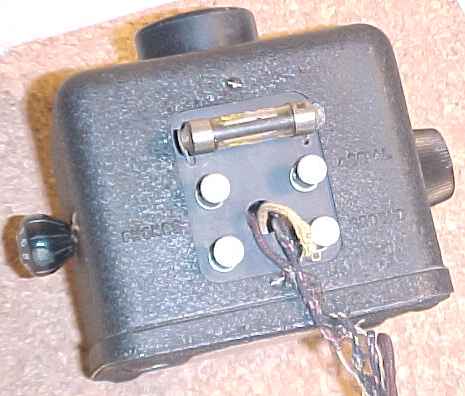
Rebuilding a Crosley Pup grid leak resistor.
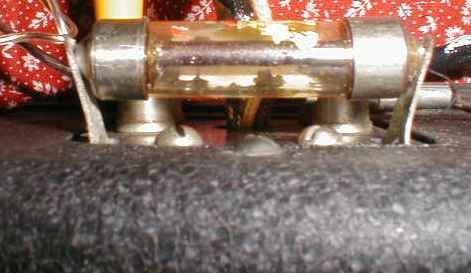
The original 3 megohm Montgomery Ward grid leak wasn't working. The rebuilt grid leak is on the right. One of the metal end caps was heated slowly with a butane lighter flame held near the cap. The flame was not allowed to touch the cap in order to avoid cracking the glass envelope. The cap was removed by gently twisting it with a pair of pliers while holding the opposite cap in vice grips snugged up just enough to hold that cap from slipping. The resistance element, a carbon coated glass rod, broke free of the cap that was held in the vice grips and came out in one piece, still attached to the cap that was removed. It was then cut free from the cap with a dremel tool. A tiny hole was drilled in the end of each cap:drilled from inside of the removed cap and from the outside of the other cap because that one was still attached to the glass envelope. The metal chips caused by the drill were removed from that cap by gently tapping the end of the glass envelope on the work bench. The other cap was also tapped on the bench to remove chips. A modern 2.8 megohm carbon film resistor was hidden inside a piece of braided plastic tubular insulation. The black insulation I had on hand was too small to slide over the resistor, but some tan colored insulation was a perfect fit. I darkened the insulation with a black marker pen. The resistor was inserted into the glass envelope with the leads coming out of the holes in the end caps. These were bent over the caps, tacked with solder, then cut off flush with the ends caps.
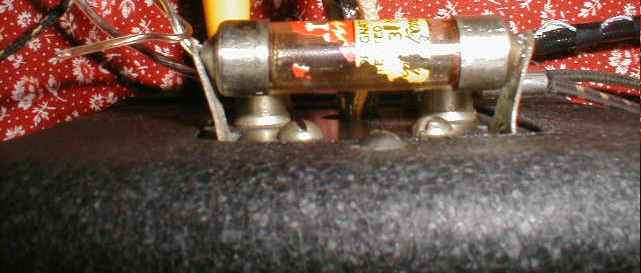
Another view of the rebuilt grid leak showing the label.